

A few weeks ago I was looking through Pinterest because I was looking for an idea what to pack in a ’secret santa‘-Covid-19 edition package. I already had the main gift finished but I wanted to pack a little extra.
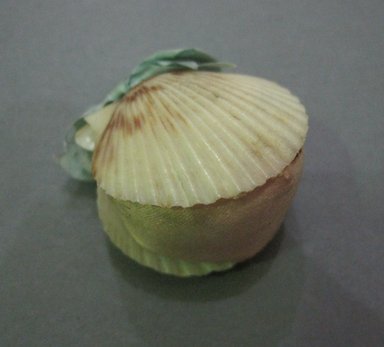
This had me going down the rabbit hole of pinterest and it’s many ideas, pictures and DIYs. After a while I found pictures of shell pincushions from the 19th century and I absolutley loved them! They are small, cute, look nice on your sewing table or can act as great props when you’re taking pictures in costume while sewing. Google showed me even more pictures of those shell cushions and later I even found instructions on the Blog Two Threads Back!
But this was only after I gave them a try myself.

So. What do you need?
- 2 (sea)shells
- fabric scrap of your choice
- needle and thread
- filling material
- fast drying glue or a hot glue gun
This DIY is super easy and took me maybe 20 minutes from start to finish.

- You start with deciding how far apart you want your shells to be. I wanted to get a pretty big pincushion so I decided to leave them wide open.
I dumped a lot of hot glue into the shell, making sure to cover the base really good – You don’t want any glue on the outisde of the shell so be careful! If it still happens, just glue on a little bow afterwards!
Make sure to plug out your hot glue gun now because they get super hot and I burned myself pretty bad when I touched it later to use it on the last step)

- Next you cut out a round-ish piece of your outer fabric and use a running stitch on the outer end.
- Then prepare your filling material. You can use whatever filling material you have. Teddy bear stuffing, fabric scraps, and so on. Since I only had a volume fleece, I cut out a circle. I also could have picked it apart!

- I started by folding the fleece on itself and then started sewing it down with a heavy duty thread. it’s important to get a very round ball of filling material. Make sure to test if it fits into you shells!

- You’re almost finished! Fill your outer fabric with your filling material of your choice and sew it shut as good as you can.
- Now you can use your hot glue gun again to glue the ball into the shell. If the glue is showing somewhere don’t be too concerned and just put a little bow on it!
And that’s it. A super easy and fun project where you can use up pretty fabric scraps ans shells you collected on your last vacation which are lying around or are stored away in a box in the darkest spot of your cupboard make something useful out of it. You could also knit or crochet those little balls and glue them in!
Stay tuned for my next blog post! I’m working on a super easy 1890s Cycling Bloomers pattern!


