Sorry that I wasn’t posting in the past two weeks! I was super busy with school and had almost no time to sew things I’m allowed to show you. (Still waiting for the okay to show you what I’m working on in school!)
But today I finally have something that is worth sharing (at least I hope so!)
Many of you know that I love to embroider but don’t do it so much because my left wrist hurts like hell if I do it too much (I would need surgery but haven’t found a doctor I trust enough yet :D). But well. It’s embroidery season again and today I want to share how I transfer my embroidery patterns to my fabric!
I’m using a technique my embroidery teacher in school recommended and never looked back to my old methods with sticking everything on a window to trace. This technique is also used in haute couture embroidery!
It’s a bit more time consuming than the window method but I think it’s neater and also easier and gives a better result.
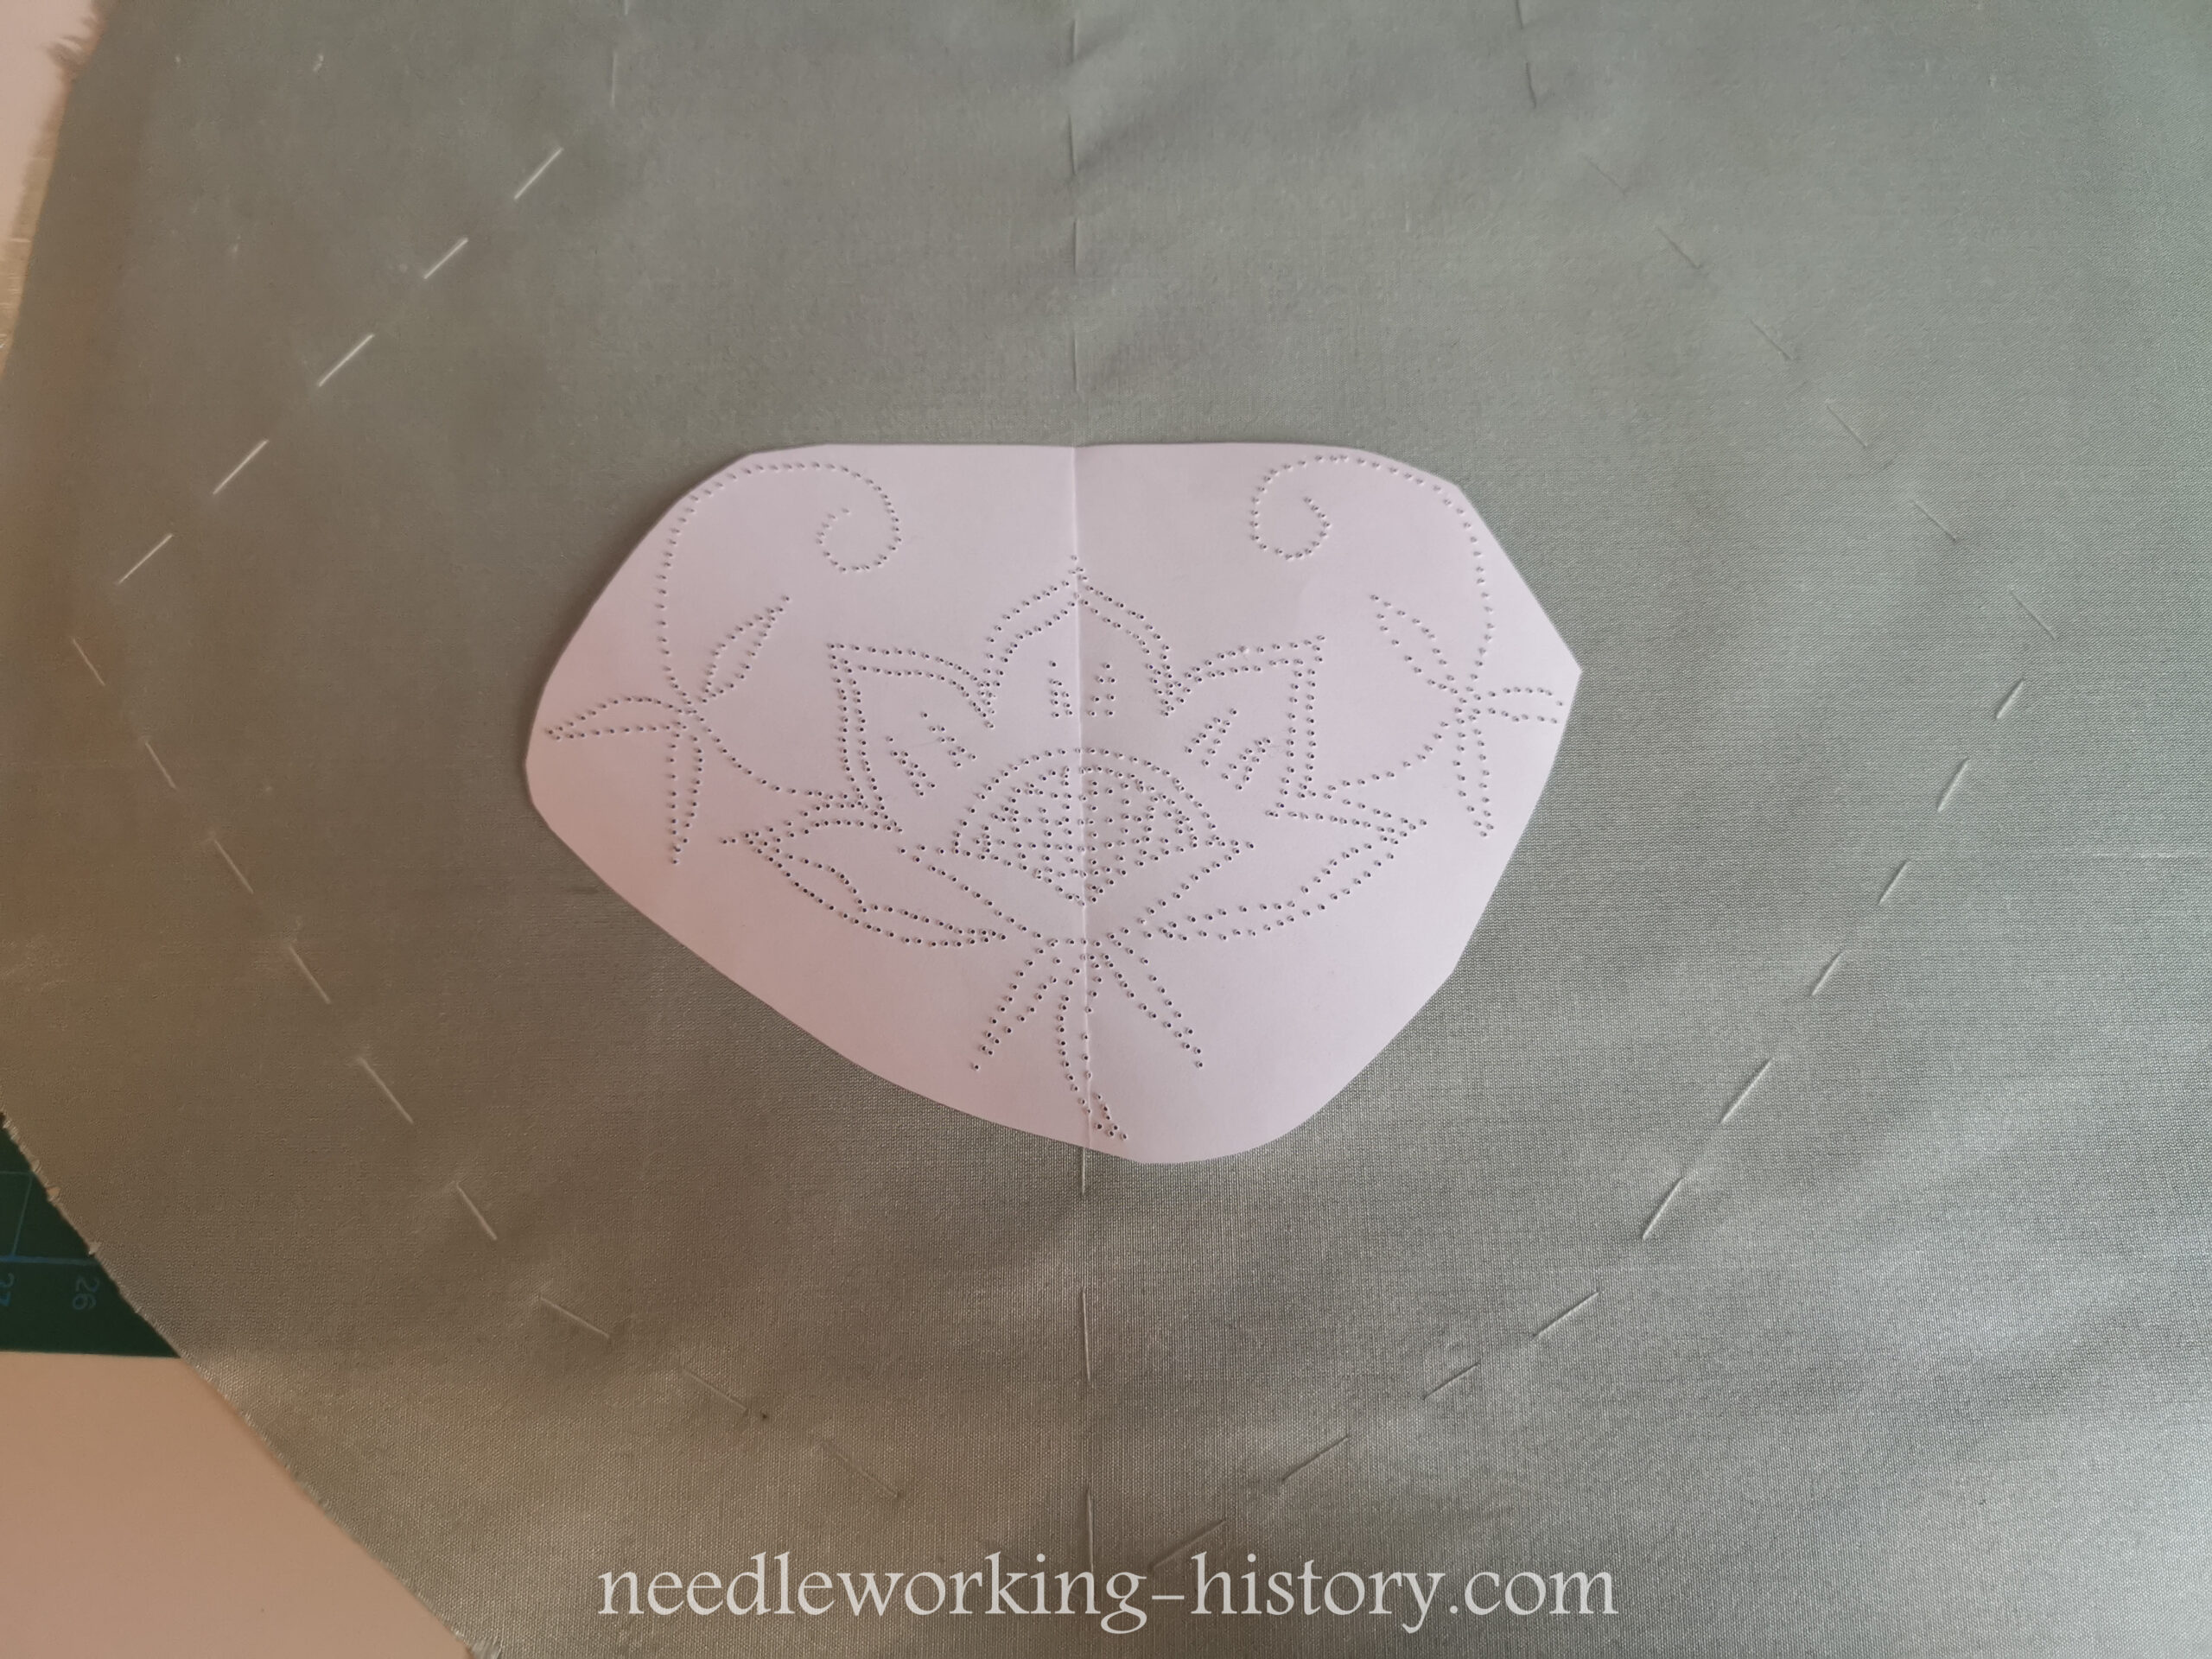
You will need: paper with the embroidery pattern, a towel or thick fabric, a needle (use one with a glass head, because you have a better grip), chalk powder (You can rub a broken piece of chalk on sandpaper to make it yourself!), a pencil and of course your fabric you want to embroider.
- You start with placing your pattern on the towel or fabric and start with pricking the pattern with your needle. It works best if the pricks are about 2-3mm apart. When you turn your pattern upside down you should clearly see the lines!
- When you have done this you can place the pattern on your fabric and stick it to it with a little bit of sticky tape.
- And then you sprinkle the pattern with your chalk powder und rub it in. I do it with my finger but you can also use a smooth piece of wood to rub the powder in.
- Now you gently blow away the leftover and remove the paper pattern. Now you only have to gently redraw the pattern with a pencil and can start embroidering!


You can use this technique for all embroidery patterns. No matter if it’s very small or very big. I used this technique to transfer the fairly big embroidery pattern for my graduation collection. You can see how great the pattern transfered with this technique in the video!


