• Home
  • About
  • Projects
    • Medieval & Renaissance
    • 1720 -1790 – Rococo
    • 1790 – 1820 – Regency
    • 1820 – 1850 – Biedermeier
    • 1850 – 1870 – Crinoline
    • 1870 – 1890 – Bustle
    • 1890 – 1914 – Belle Epoque
    • Hair & Make up
  • Collaborations
  • Links
  • Contact
Logo
Logo
1890 – 1914 – Belle Epoque DIY

The Making of Fortunys ‚Delphos‘ – Pleating

needleworking-history
12 Comments
28. Juli 2023
5 Mins read
20230302_234745

If you follow me on Instagram you already saw, that I finished my Delphos quite some time ago, but I just hadn’t found the time to write a blog post.
I also redid my website and I’m currently preparing my new website which will be linked to my future web-shop, since I plan to start selling historical underwear, accessoires and making historical reproductions. I also plan to take commissions, but since I still work a normal day job I won’t be able to start everything at one.

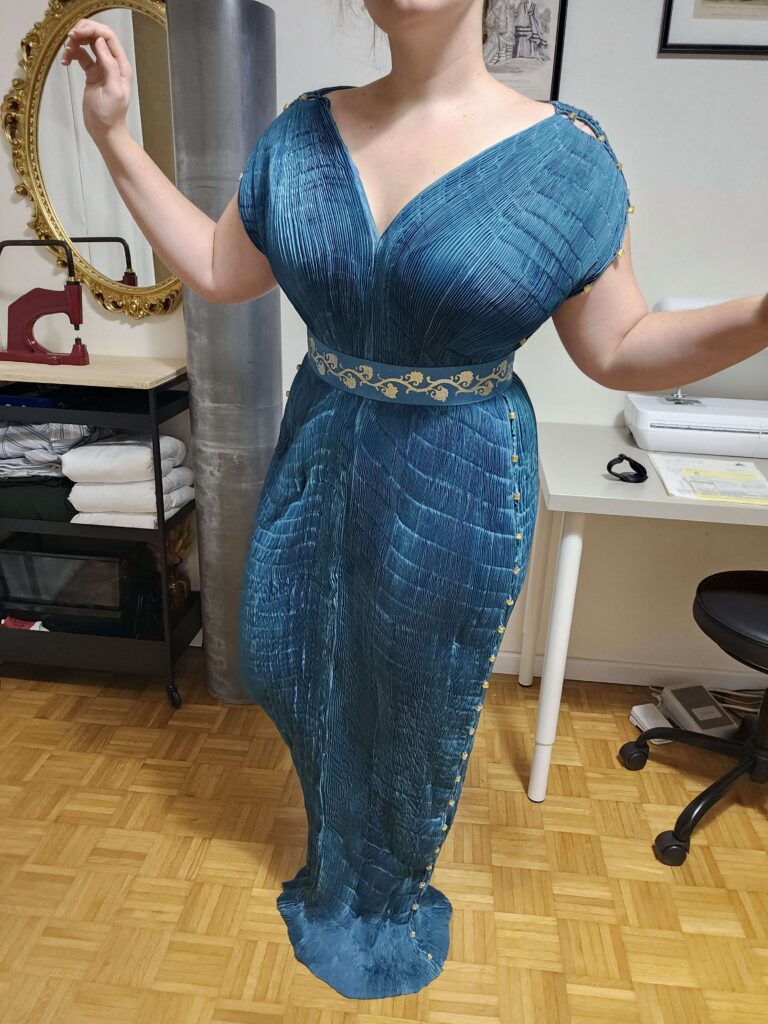
But today I finally can show you how my Fortuny gown came to life!

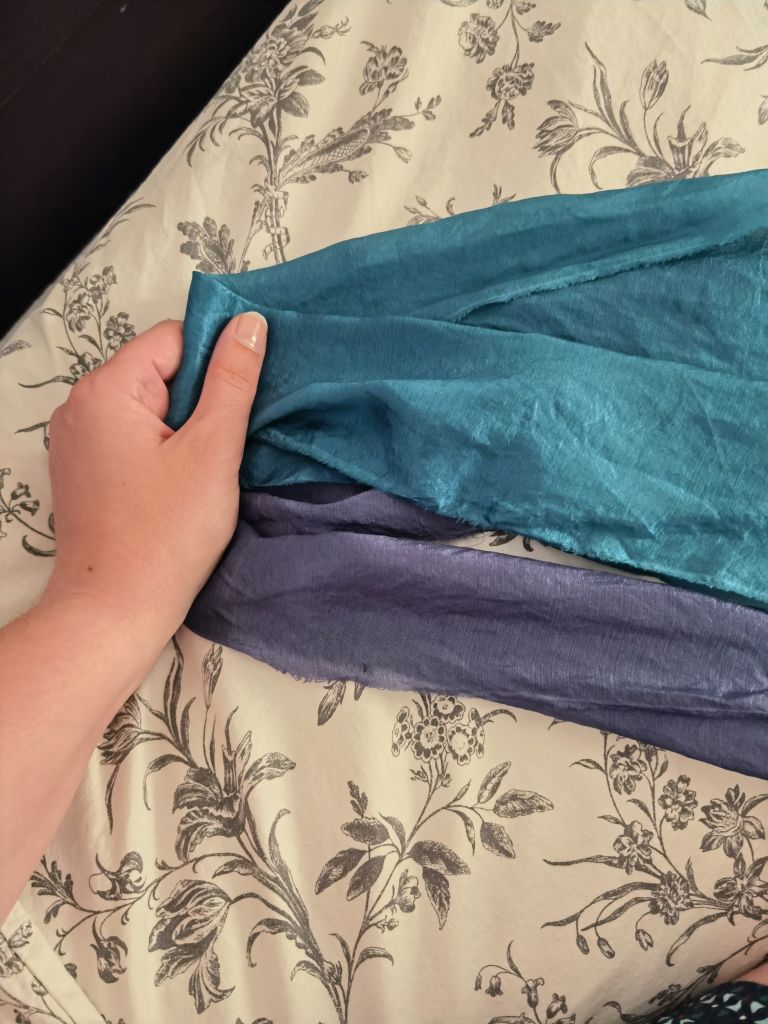
I first started with trying out some pleating techniques I found online.

I tried running stitches for making the pleats which did not work at all – you also could see where my needle punctured the fabric which was super ugly, I tried twisting the fabric super tight which also was not very pretty (but I think this is how Fortuny does their silk scarves nowadays…which are not pretty if you ask me).

And then I had to put on my thinking hat. I remembered that I had a teacher in school who was very into japanese dying and pleating methods. I knew that Mariano Fortuny and his wife got their fabrics from japan so I tried to find a connection and I found one! There is a dying/pleating technique named ‚Arashi Shibori‘. And this is exactly how I made my Fortuny dress.

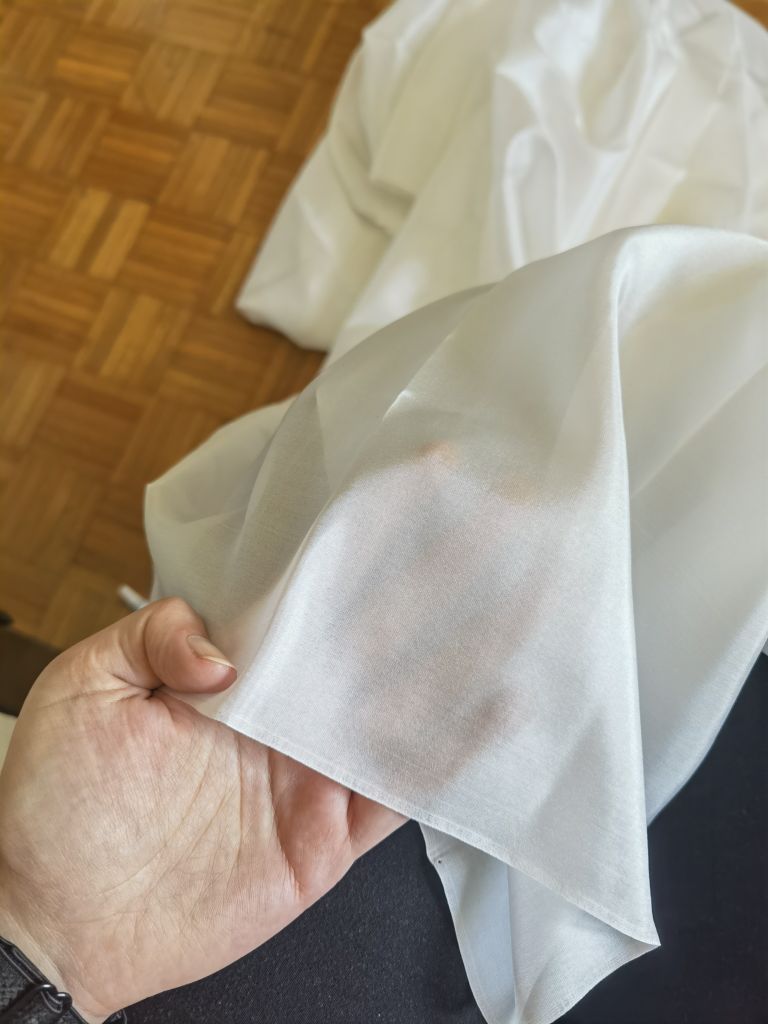
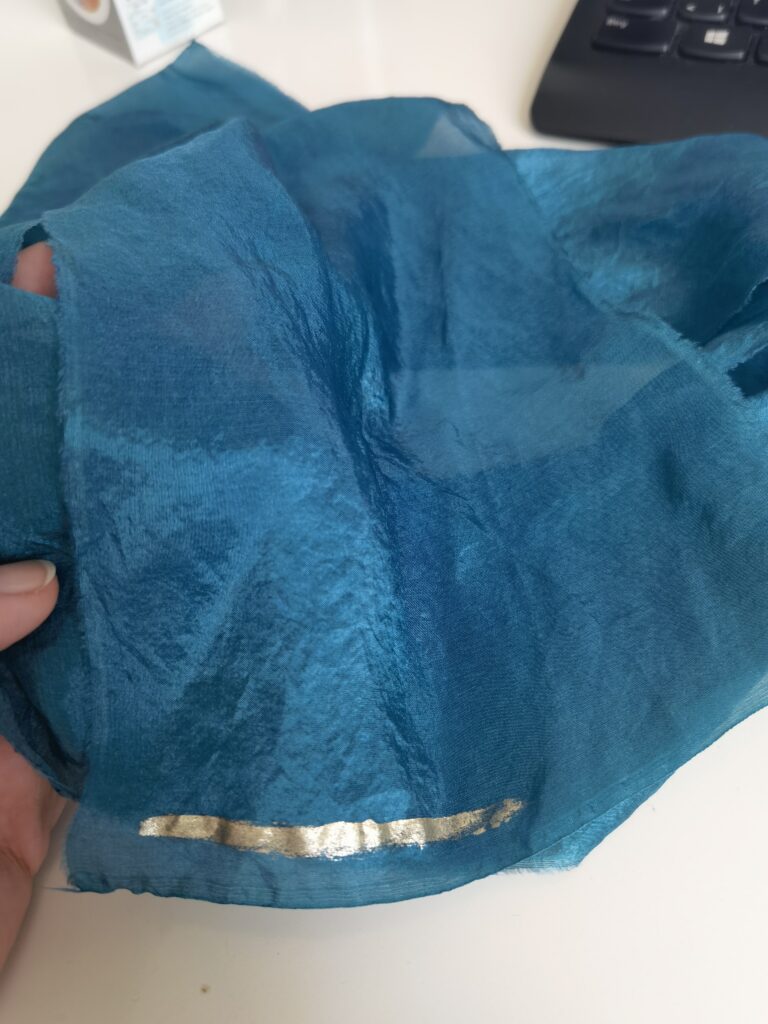
But before pleating my fabric I had to get my fabric and dye it. I bought a super light silk habotai and dyed it with a fabric dye from Kreul. The gold fabric paint is also from them. I also tried out another fabric dye but it came out spotty and very dull.
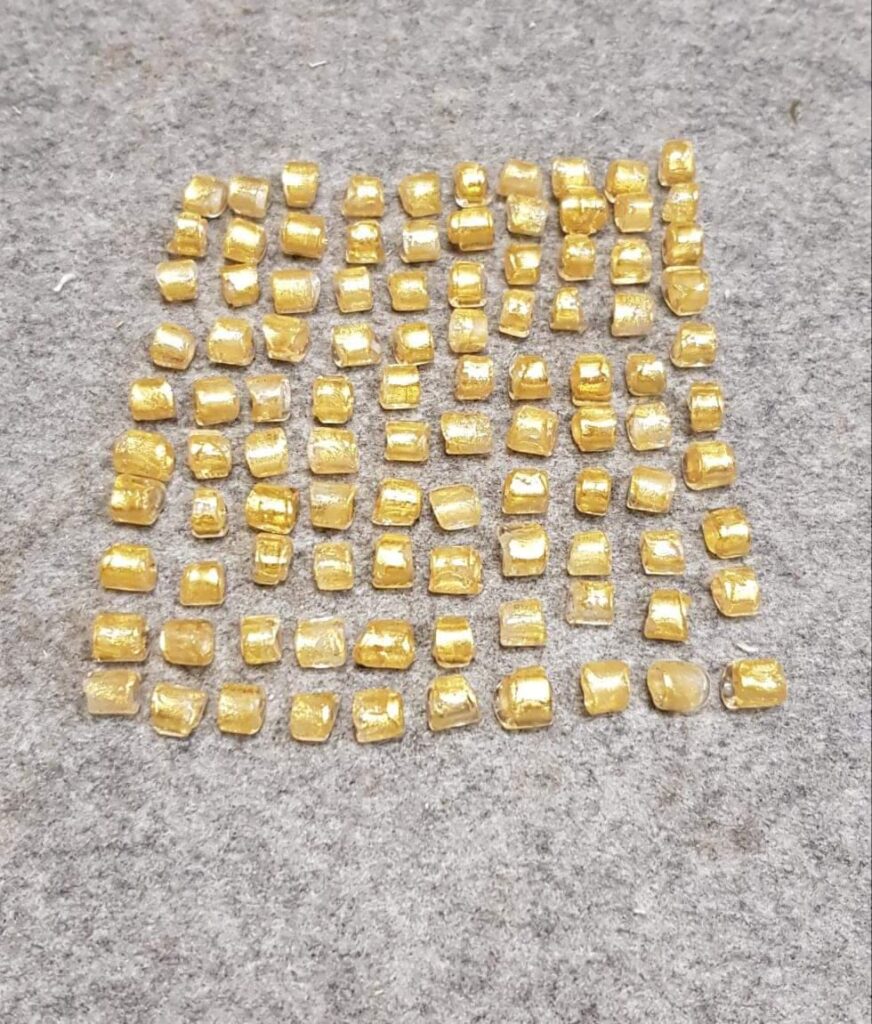
My glass beads were custom made for me with Murano glass rods and real gold leaf and I love them!


So let’s start pleating!

What did I need for 4 lengths of fabric?
1 PVC pipe with a diameter of 22.5 cm, which is at least as long as the fabric.
2 rolls of thin crochet thread (doesn’t matter how thin, but it needs to be strong)
some Tixo
sewing needle + thread
Spray starch (500ml water, 1 tbsp rice flour boiled up and a good shot of cheap vodka added at the end so it doesn’t start to ferment immediately)
Hot water with a good dash of vinegar
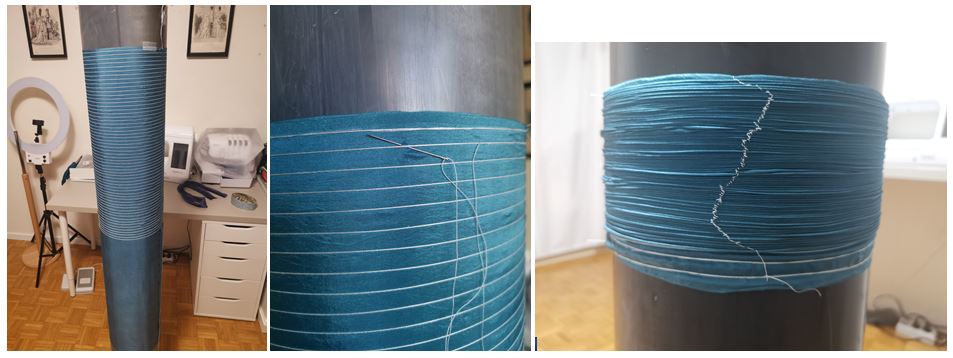
Step 1:
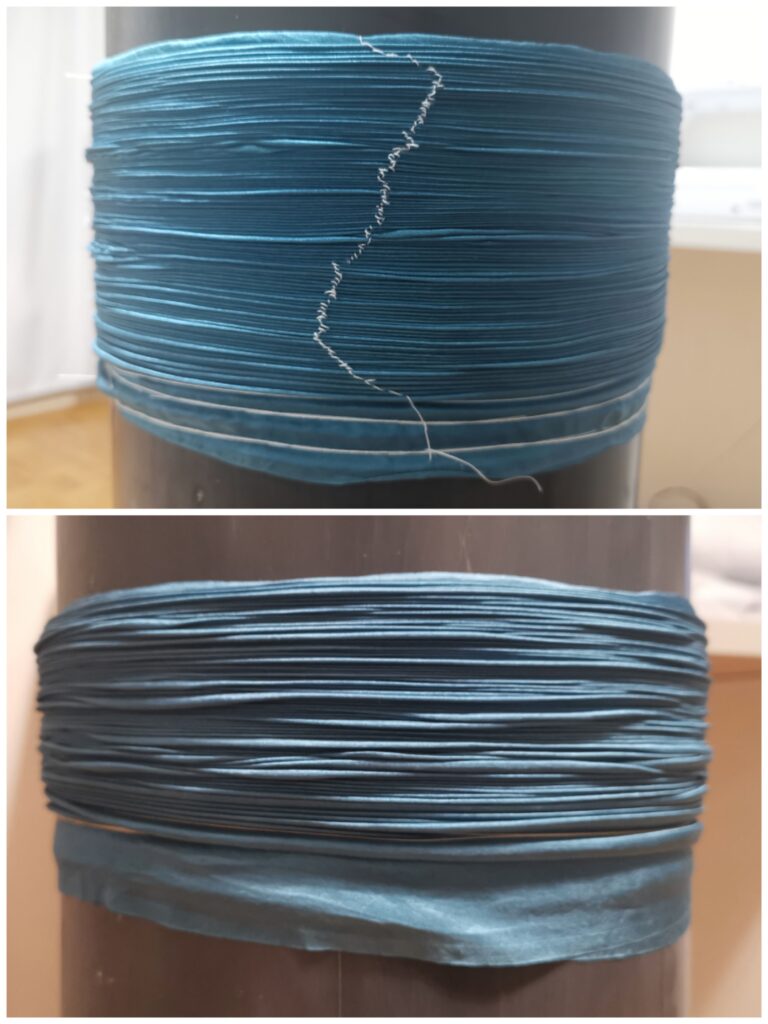
The very first thing I did was to wind my fabric panels onto the roll with the right side of the fabric and the finished hem facing outwards and fix them with some Tixo. It is important that the hem runs vertically along the roll. Then I sewed on my crochet yarn with two stitches at the end point of the hem. Perpendicular to the hem I also pinned the fabric with very fine pins. It doesn’t have to be super tight, but it shouldn’t be too loose either.

Step 2:

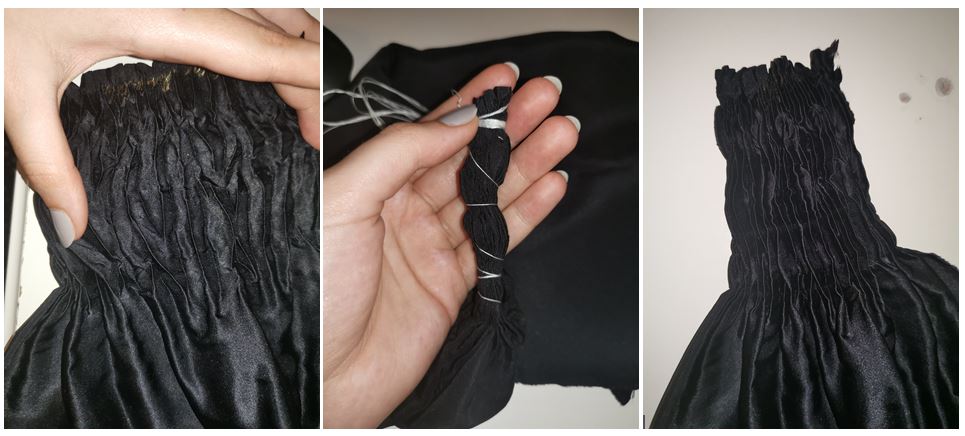
Time to get a ‚Drehwurm‘: You start to wind the crochet yarn around the fabric at a maximum distance of 10 mm. I roughly orientated myself at 8 mm, so if it got a little more or less, it was not a big deal.
not too bad.
Once you have wrapped the yarn completely around the fabric, you sew it down again with two stitches at the bottom.

Step 3:
Using normal sewing thread, sew the first and last 2-3 rows in place with large stitches all the way around and then sew down four times vertically so that the rows can’t slip so much. I tried it without sewing it down and it was so uneven that I had to open it all up again.

Step 4:
Start pushing the fabric together slowly and as evenly as possible. I always started from the top and a little later pushed the fabric up from the bottom as well. If rows were obviously very out of place, I carefully pulled the folds into shape with my fingers and a pin. At the end I tied a twill tape above and below the pleats to prevent the ends of the fabric from slipping away.
Very important: Now remove the vertical securing seams!

Step 5:
Put the tube in the bathtub and „wash“ the tube and the fabric once with hot water.
Then I poured the hot water with the vinegar over the fabric and let it drip off briefly. And then I just sprayed on my spray starch. I can’t tell you how much it was, I just sprayed until it felt right.
And then it was a case of waiting. The tube stood in the warm bathroom right next to the heater and was allowed to dry there for at least 24 hours at a time. I also activated the hairdryer in between, but that’s not a must.
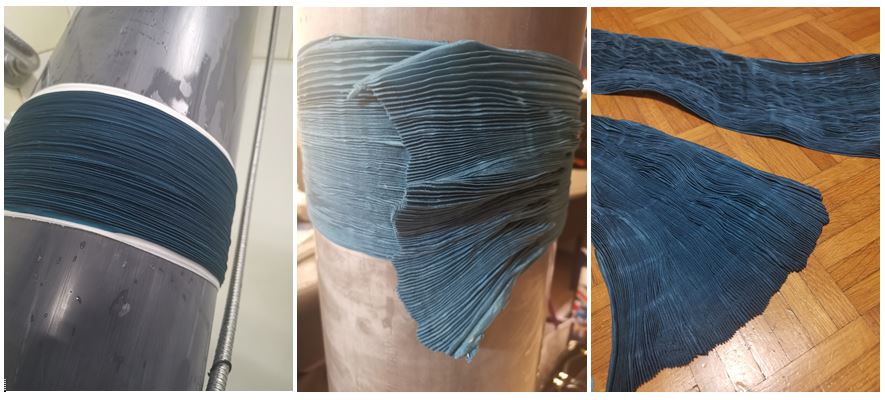
Step 6:
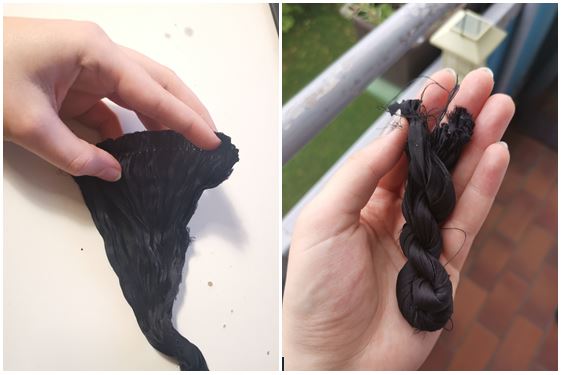
Once the fabric was dry, I used the edge of the hot iron to press these grooves into the fabric. After that, I simply removed the remaining securing seams and the crochet thread (Hello Drehwurm, my old friend) and then I pulled the fabric off with gentle force. This was a very exciting experience, because it was somehow firm and soft at the same time and made a very dusty sound.
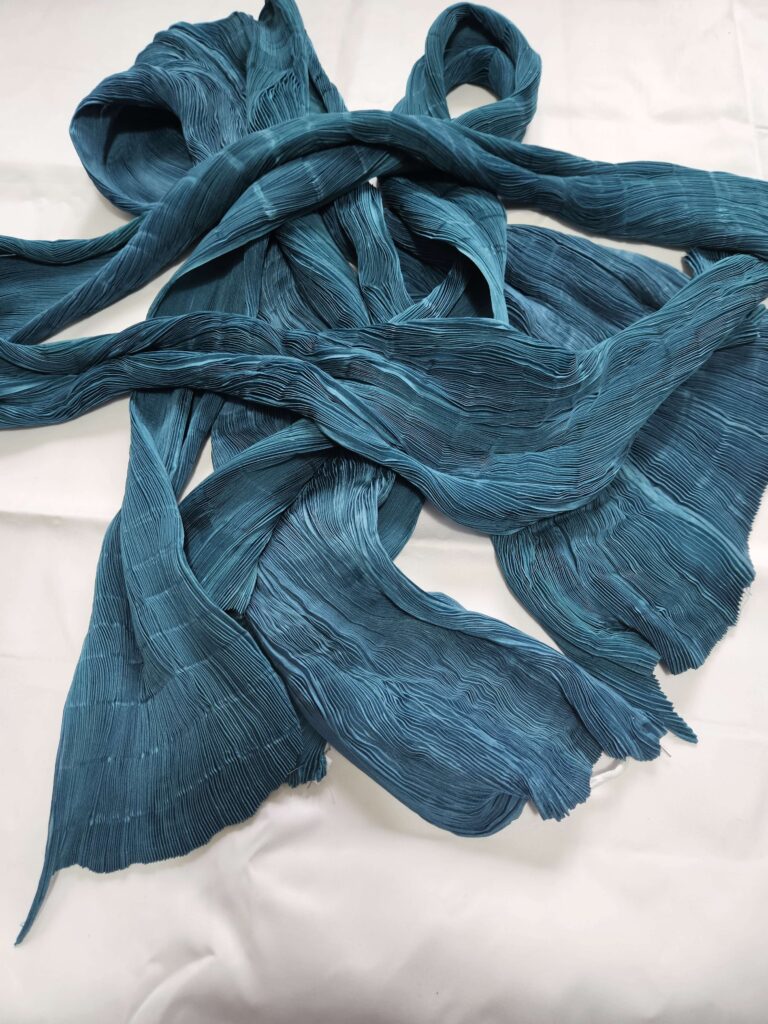
And voila: A Fortuny panel is finished.
And have fun: You can do the whole thing 3 more times!

And here are all my Fortuny panels. I just LOVE how they looked.

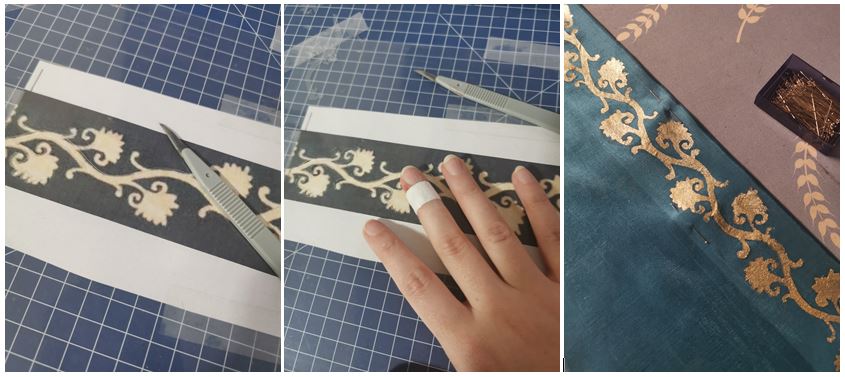
The belt was a real quick and dirty project.
I looked for a real Fortuny pattern that I liked and made a template. I simply took a firm plastic foil and worked on it with a scalpel. And kids: these things are sharp!
Then I just took the template, put it on a leftover piece of my silk and applied the colour with fabric paint from Kreul and a sponge.
The belt was sewn quickly: two layers of strong cotton, glued with adhesive fleece and covered with the fabric. Then two beads and loops and two hidden hooks and eyes were sewn on and it was finished.

And then all what was left was sewing together the panels. Sadly I didn’t take pictures of this but I just sewed the selvedges together by machine. The pleats on the shoulders were secured by threading them on some strong sewing thread.
and then I sewed on the silk string while threading on the glass beads. They stay where they are because the string is completley sewn onto the fabric. At the end I connected the shoulders with the beads. And then suddenly I was done.

Real photos and what I would change will be in the next post 🙂

The very first try on of my delphos
Shares
12 Comments
  1. Kate

    5. September 2023 02:52

    This is absolutely incredible, and oh, the color, the color!! Great work. Congratulations; I am sure this was tricky and took plenty of time and patience.

    Reply
    1. needleworking-history

      21. September 2023 11:40

      Thank you so much! I’m in love with the color too <3 And it really did take a lot of time and patience. When I knew how to make the pleats it took me around 4-5 hours of work for each panel to be pleated (not including the waiting times)...but it was SO worth it I think 🙂

      Reply
  2. sophie

    22. Februar 2024 19:36

    I would really like to make one of these – thank you so much for sharing your process. Could you elaborate on why there are horizontal lines (crossing the pleats) every 20-30mm?

    Reply
    1. needleworking-history

      22. Februar 2024 20:00

      You’re very welcome! I wanted to make those dresses more accessible. I know there are a few bigger creators out there but not a single one of them shared the whole process. I don’t want to gatekeep those ‚instructions‘
      And the horizontals lines are there because I tried to simulate those lines from older and also the new polyester-fortuny gowns. It doesn’t look so good, so I’d leave them out the next time!

      Reply
  3. Elena

    19. März 2024 04:42

    Thank you for sharing! Absolutely amazing! Do you have video of the process?

    Reply
    1. needleworking-history

      5. April 2024 15:24

      Hi! I have videos of the process but I still need to make a video out of it and upload it..it’s on my To-Do, but other projects are more important right now

      Reply
  4. Ariel

    3. April 2024 02:45

    Amazing! Is the silk habotai that you got 100% silk or is it polyester?

    Reply
    1. needleworking-history

      5. April 2024 15:26

      Thank you! It’s 100% silk. 🙂 You can also use polyester. It would probably hold it’s shape better

      Reply
      1. Ariel

        10. April 2024 03:44

        Thank you! One follow up question. How much larger did you have to make your pattern pieces to account for the pleats? I’m doing some studies and it seems like I need to make the patter. from 1.25 -2 times bigger.

        Reply
        1. needleworking-history

          30. Juni 2024 11:39

          Well, for ‚real‘ pleats you always need 3x of the width. I just took 4 widths of the fabric because it was easier to sew selvedges together because then there was no need to finish the seams.

          Reply
  5. Barbara

    24. Juli 2024 19:08

    Thank you so much! I am mulling over making a fortuny dress since years…. Your instructions are so very interesting and I am exited to jump into the next fabric store :-)…
    A little question: in another video I saw a similar procedure but after the step with vinegar / starching, she let it first dry out and the put it into the oven (with a bowl of water) to really „cook“ the pleats into the fabric.
    Do you think that would be a good idea? kind regards Barbara

    Reply
    1. needleworking-history

      6. August 2024 20:33

      Hello! This sounds amazing! Please send me a picture when you are finished – I love to see ‚Fauxtunys‘ others made.
      And you can definitely try to bake it. But you need to remember that natural fabrics will always be able to go back to a smooth state and water/steam can help with smoothing it out again. I would try a low heat without water.
      With my Fauxtuny I noticed, that the hot water was enough to set the pleats enough to survive a bit of water. Mine got wet at the bottom and the pleats were still there after drying.

      Reply
Schreibe einen Kommentar Antworten abbrechen

Deine E-Mail-Adresse wird nicht veröffentlicht. Erforderliche Felder sind mit * markiert

Previous Post

The dress in a painting – in the serre from Otto Eerelman (~1876) Part 2

Next Post

The Making of Fortunys ‚Delphos‘ – Venice

You might also like
Fortunykleid (1)
1890 – 1914 – Belle Epoque

The Making of Fortunys ‚Delphos‘ – Research

5 Mins read
15. März 2023

Mariano Fortuny and the Delphos dress Mariano Fortuny was spanish but nowadays he’s most known for the time when he lived in venice in italy. He was an artist, architect and inventor and not, like many sources say, a fashion designer. He did not see the dresses as fashion, but more as a form of …

IMG_3387
1890 – 1914 – Belle Epoque Events

Sommerfrische in Bamberg – Part 2

2 Mins read
29. Juli 2022

On the second day of Sommerfrische we had a ball! Our Sommerfrische-balls are always the highlights of the Sommerfrische – we get to dance, laugh and wear all the evening wear, we don’t get to wear otherwise. Dorothee outdid herself this year. The ball took place at ‚Aufseßhöflein‘ a little villa which was bought by …

1890 – 1914 – Belle Epoque Authentic Patterns

Entering the edwardian era – a ball gown and some extras

3 Mins read
10. Juni 2021

The edwardian era was a time of big changes – in society, industry and also fashion and it was always a time which I loved. As many of you know I live in vienna, a city which is known for all the beautiful buildings from around 1900. We don’t call this era edwardian here but …

Lifestyle Blog & Magazine WordPress Theme
Logo
Our site uses cookies. Learn more about our use of cookies: cookie policy
I accept use of cookies